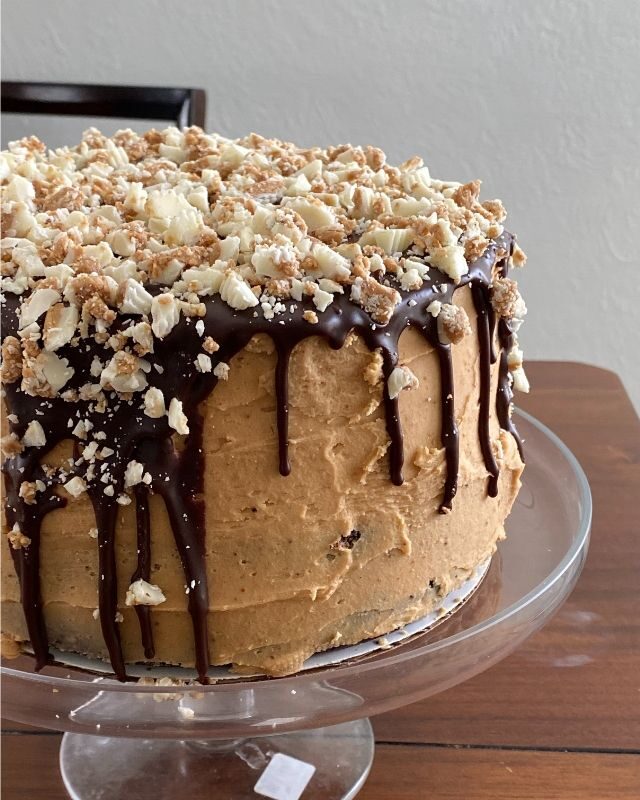
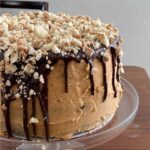
chocolate brownie peanut butter cake
I love baking. It is defiently such a labor of love, which is why I like to bake for friends for their birthday. My girlfriend Chelsa loves a good peanut butter and chocolate combo so I thought this was a fun play on her favorite combination.
The key with making a cake like this is to give yourself plenty of time to let the layers cool. If I’m making it on the weekend, I’ll bake the rounds on Friday night and start to build it over the next two days. More or less, don’t try to start making a cake like this when the party you have to be at is in a few hours lol. You’ll be stressed and rushed and the cake will be crumbling everywhere.
chocolate brownie peanut butter cake
Description
When I went to make this cake, I browsed recipes on Pinterest for homemade brownies and thought about the three elements separately – the cake (brownie), the frosting, and the design. If you’re in a rush you could probably get away with using boxed brownie mix, but I haven’t tried it myself.
Ingredients
brownie cake:
- 1 stick unsalted butter
- 8 ounces baking chocolate, chopped
- 1 cup granulated sugar
- 2/3 cup brown sugar
- 3/4 cup all-purpose flour
- 1 cup unsweetened cocoa powder
- 3/4 teaspoon baking powder
- 1/2 teaspoon flakey salt
- 5 large eggs, at room temperature
- 1/2 cup avocado oil
- 1 teaspoon vanilla extract
peanut butter buttercream:
- 2 sticks unsalted butter at room temperature
- 1 cup creamy peanut butter
- 1 teaspoon vanilla extract
- pinch flaky sea salt
- 2 1/2 cups powdered sugar, sifted
chocolate ganache:
- 4 ounces semi-sweet chocolate
- 1/2 cup heavy whipping cream
- chopped peanut butter cups
Instructions
Make the cake layers:
-
-
Preheat the oven to 350°F. Grease and line three 8-inch cake pans with parchment paper.
-
Microwave butter and chocolate for 45 seconds. Stir and continue to heat every 30 seconds, stirring in between. Whisk in the sugars until it’s totally combined. Let cool.
-
Whisk together the flour, cocoa powder, baking powder, and salt in the Kitchen Aid.
-
To the cooled chocolate mixture whisk in the eggs, one at a time with the mixer on low. Add in the oil and vanilla. Add the dry ingredients and gently fold to combine.
-
Divide the batter between the three cake pans. Toss the pan onto the counter (kind of hard) to get any air bubbles out.
-
Bake for 25 to 30 minutes, or until the tops are dry and a cake tester inserted in the middle comes out with a few crumbs attached.
-
Cool in pans for 10 minutes, then turn out onto a wire rack and allow to cool completely. You can store the cakes in the fridge wrapped up – which is what I did – since I baked these on Friday and didn’t assemble until Sunday.
-
Make the frosting:
Assemble the cake:
Here are my tips:
- I will say this time and time again, baking is a labor of love! A cake like this takes a few days to cool and properly set between layers. Bake the cake one day, decorate the next. Cool cakes are the easiest to frost.
- Use a turntable for decorating. This is the one I use. I’ve found them pretty cheap at Walmart and Target. Turntables help you decorate so much easier
- Do you have a bench scraper? I’ve found this kitchen tool so handy even outside of making cakes. This will help you smooth out the frosting to give it the bakery look.
- Make it your own! I had no idea what I was going to end up with when I started assembling this cake but I’m so happy with how it turned out. I had extra peanut butter cups on hand to use as garnish – which turned out so cute!
Make chocolate drip:
-
Place the chocolate in a heatproof bowl. Bring the heavy cream to a simmer then immediately remove from heat and pour over chocolate. Cover for a few minutes with a lid and stir until smooth.
-
The ganache will cool and become thicker (but you still want it pourable!). Leave it on the counter to cool. You can test the consistency of the drip by pouring down the side of a glass. If it’s too thick, microwave for 5 to 10 seconds. If it’s too thin, allow to continue to cool. Spread the ganache all over the top of the cake and watch it drip down the sides ?.